Rock Tumbling Mistakes can turn an exciting hobby into a frustrating experience for beginners. Many newcomers dive in without proper preparation, leading to poor results and damaged equipment. Understanding these common pitfalls helps you achieve the polished stones you’re hoping for.
Learning from others’ experiences saves you time, money, and disappointment. With the right knowledge and techniques, rock tumbling becomes an enjoyable process that produces professional-quality results.
TL;DR
- Use a 2:1 to 3:1 rock-to-water ratio by volume to prevent equipment damage and ensure effective grinding.
- Never mix rocks with different hardness levels – a 3-point difference on the Mohs scale can cause scratching.
- Clean your tumbler thoroughly between each grit stage to prevent cross-contamination that ruins final results.
- Follow the complete 4-stage process – coarse grinding, fine grinding, pre-polishing, and final polishing for best results.
Rock Tumbling Mistakes That Ruin Your Results
The most damaging mistakes happen before you even start your tumbler. Poor planning and unrealistic expectations set you up for failure from day one.
Skipping research about your specific rock types leads to compatibility issues. Each stone has unique properties that determine tumbling time, grit requirements, and final polish potential.
Mixing Incompatible Rock Types
Combining rocks with different hardness levels creates uneven wear patterns. Softer stones get ground down while harder ones barely change, leaving you with a barrel of inconsistent results.
- Hardness mismatches – Keep rocks within 2-3 points on the Mohs scale for best results.
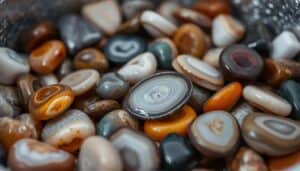
- Porous vs non-porous – Separate limestone and sandstone from quartz and jasper to prevent grit absorption.
- Size differences – Tumble similar-sized stones together to ensure even contact and polishing.
Unrealistic Timeline Expectations
Rock tumbling takes 4-6 weeks minimum for quality results. Rushing through stages produces dull, scratched stones that look nothing like professional work. Understanding how long does rock tumbling take helps set proper expectations for your projects.
Each grit stage serves a specific purpose and needs adequate time to complete its job. Cutting corners here guarantees disappointing final results.
Equipment Setup Problems
Wrong equipment choices and poor setup techniques cause more problems than any other factor. Your tumbler type, barrel filling method, and maintenance routine directly impact your success rate.
Choosing the Wrong Tumbler Type
Rotary tumblers work best for beginners and larger batches, providing consistent results over 4-6 weeks. Vibratory tumblers finish faster but require more experience to operate correctly.
Match your tumbler choice to your experience level and project goals. Starting with a quality rotary tumbler gives you the best learning foundation and helps you select from the right rock tumbling supplies for your needs.
Barrel Filling Mistakes
Overfilling barrels prevents proper tumbling action and can damage your equipment. Underfilling creates excessive noise and uneven wear patterns on your stones.
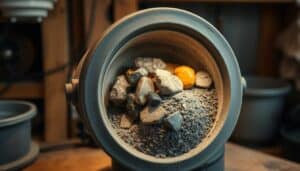
- Fill barrels 60-70% with rocks – This allows proper tumbling motion without overcrowding.
- Add water to cover rocks – Use the 2:1 to 3:1 rock-to-water ratio for optimal results.
- Check manufacturer specifications – Every tumbler has specific capacity requirements.
Pro Tip
Test your setup with a small batch first. This helps you understand your equipment before committing to larger, more valuable stone collections.
Grit Stage Errors That Waste Time
The four-stage grit process requires precision and patience. Mistakes here compound through each stage, ultimately ruining your final polish.
Using Wrong Grit Amounts
Too little grit makes grinding ineffective, while too much causes stones to stick together and prevents proper tumbling action. Follow manufacturer guidelines for grit-to-rock ratios and consult our rock tumbling grit guide for specific recommendations.
Most tumblers need 1-2 tablespoons of grit per pound of rock, adjusted for specific stone hardness and desired results.
Cross-Contamination Between Stages
Leftover coarse grit in fine polishing stages creates scratches that can’t be removed. Thorough cleaning between each stage prevents this expensive mistake.
- Rinse rocks completely – Remove all grit residue before advancing to the next stage.
- Clean barrel thoroughly – Use dish soap and inspect for any remaining grit particles. Our guide on how to clean rock tumbler barrel provides detailed cleaning steps.
- Check rubber seals – Grit buildup here causes leaks and contamination issues.
Troubleshooting Common Problems
Even experienced tumblers face occasional issues. Knowing how to diagnose and fix problems quickly saves your batches from failure.
Scratched or Dull Stones
Surface scratches indicate contamination from previous grit stages or damaged abrasive materials. Return to an earlier grit stage and work forward again with fresh materials.
Dull finishes suggest insufficient polishing time or worn-out polish compounds. Extend your final stage or replace your polishing media.
Uneven Results
Some stones polish perfectly while others remain rough due to inconsistent contact during tumbling. Sort your stones by size and hardness before starting new batches.
Adjust your rock-to-water ratio if stones aren’t moving freely inside the barrel. Proper tumbling action requires stones to cascade smoothly as the barrel rotates.
Frequently Asked Questions
What rocks should beginners avoid when starting rock tumbling?
Skip soft rocks like limestone, marble, and calcite initially. Also avoid extremely hard stones like diamond and sapphire until you gain experience with medium-hardness rocks like quartz and jasper.
How long should each grit stage run in a rotary tumbler?
Coarse grit runs 7-10 days, fine grit takes 7 days, pre-polish needs 7 days, and final polish requires 5-7 days. Adjust timing based on your specific rocks and desired results.
Can I tumble different rock types together if they have similar hardness?
Yes, rocks within 2-3 points on the Mohs hardness scale can tumble together successfully. However, separate porous stones from non-porous ones to prevent contamination issues.
Why are my finished stones still rough after completing all four stages?
This usually indicates cross-contamination between grit stages or insufficient cleaning. Return to the fine grit stage and work forward again with fresh materials and thorough cleaning.
How often should I replace the grit in my tumbler?
Replace grit when it stops cutting effectively, typically after one complete cycle. Fresh grit produces better results than trying to reuse worn abrasive materials.
Final Thoughts
Rock Tumbling Mistakes are completely avoidable with proper preparation and patience. Understanding your equipment, choosing compatible stones, and following the complete four-stage process produces professional-quality results every time.
Start with simple projects using medium-hardness rocks like quartz or agate. Master the basics before attempting more challenging materials or complex mixed batches.