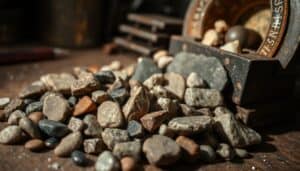
Rock Tumbling Progress Check is essential for transforming rough stones into polished gems through careful monitoring at each stage. Every successful rock tumbling project depends on knowing when to move from one phase to the next and recognizing the subtle changes that indicate proper progress.
Tracking your tumbling process helps you avoid common mistakes like under-polishing or moving too quickly between stages. By following a systematic approach to monitoring, you can achieve consistently beautiful results that showcase the natural beauty hidden within rough stones.
TL;DR
- Check coarse grind progress every 3-4 days to ensure proper shaping and edge smoothing occurs.
- Use the fingernail test during fine grind – if your nail slides smoothly without catching, rocks are ready for polish.
- Keep a detailed progress log with photos at each stage to track changes and identify issues early.
- Complete polish stage typically takes 7-10 days and should result in mirror-like shine under proper lighting.
Rock Tumbling Progress Check Fundamentals
Understanding how to monitor rock tumbling progress starts with recognizing what changes to look for at each stage. The transformation from rough stone to polished gem happens gradually, and each phase serves a specific purpose in the overall process.
The four main stages require different monitoring techniques and timeframes. Coarse grinding focuses on shaping, medium grinding refines surfaces, fine grinding removes scratches, and polishing creates the final shine.
Essential Tools for Progress Monitoring
Successful progress checking requires the right tools to evaluate your rocks properly. These tools help you make accurate assessments without guessing.
- Magnifying glass – reveals surface details invisible to the naked eye.
- Progress log notebook – tracks timing, observations, and stage transitions.
- Digital camera – documents visual changes between stages.
- Good lighting source – shows surface quality and shine development.
- Clean cloth – removes grit and debris for clear inspection.
Coarse Grind Stage Monitoring
The coarse grind stage requires the most frequent monitoring since this is where major shaping occurs. Rocks undergo dramatic changes during this 7-14 day period, making regular checks essential for good results.
Check your rocks every 3-4 days during coarse grinding to ensure proper progress. Look for gradually rounding edges, reduced sharp points, and overall size reduction of about 10-15% from the original dimensions.
Key Indicators of Proper Coarse Grinding
Several visual and tactile clues tell you whether coarse grinding is proceeding correctly. These signs help you determine if adjustments are needed.
- Edge rounding – sharp corners become progressively smoother.
- Surface texture – rough surfaces develop a more uniform appearance.
- Size consistency – rocks should tumble freely without jamming.
- Grit condition – abrasive material should remain active and not turn to mud.
Troubleshooting Coarse Grind Issues
Common problems during coarse grinding include uneven wear patterns and grit breakdown. Address these issues promptly to prevent poor results in later stages.
- Check barrel loading. Ensure rocks fill 2/3 of barrel space for proper tumbling action.
- Inspect grit quality. Replace worn grit that has lost cutting ability.
- Remove problem rocks. Soft or fractured stones can contaminate the batch.
- Adjust water levels. Maintain proper slurry consistency for effective grinding.
Medium Grind Progress Assessment
Medium grinding typically takes 7-10 days and focuses on smoothing surfaces created during coarse grinding. This stage requires careful attention to ensure all rocks progress evenly toward the fine grinding phase.
Surface texture becomes noticeably smoother during medium grinding, though some scratches will still be visible. The goal is achieving uniform surface quality across all rocks before moving forward.
Visual Changes During Medium Grinding
Medium grinding produces subtle but important changes that prepare rocks for fine grinding. These changes indicate proper progress toward a polished finish.
- Uniform surface texture – rough areas become consistently smooth.
- Reduced scratch visibility – deep scratches from coarse grinding fade.
- Consistent coloration – natural colors become more apparent.
- Smoother edges – all edges feel uniformly smooth to touch.
Quick Progress Check
Run your finger across rock surfaces – they should feel smooth without catching on rough spots. If you detect uneven texture, continue medium grinding for 2-3 more days.
Fine Grind Stage Evaluation
Fine grinding requires 7-10 days and creates the smooth surface needed for successful polishing. This stage removes remaining scratches and prepares rocks for their final transformation.
Progress during fine grinding is subtle but critical for achieving maximum polish quality. Surface smoothness becomes the primary indicator of readiness for the final polishing stage.
The Fingernail Test for Readiness
The fingernail test provides a reliable way to determine if rocks are ready for polishing. This simple technique helps you avoid moving to polish too early.
- Clean the rock surface. Remove all grit and debris for accurate testing.
- Run fingernail across surface. Apply light pressure while moving across different areas.
- Check for catching. Fingernail should glide smoothly without catching on scratches.
- Test multiple rocks. Ensure all rocks in the batch meet the smoothness standard.
Magnification Inspection Techniques
Using magnification reveals surface details that determine polishing readiness. This inspection method catches problems that might affect final results.
Examine rocks under 10x magnification to check for remaining scratches or surface imperfections. Properly prepared rocks should show minimal scratching and uniform surface texture under magnification.
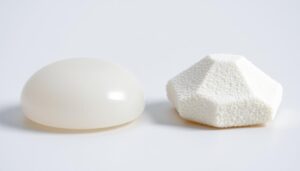
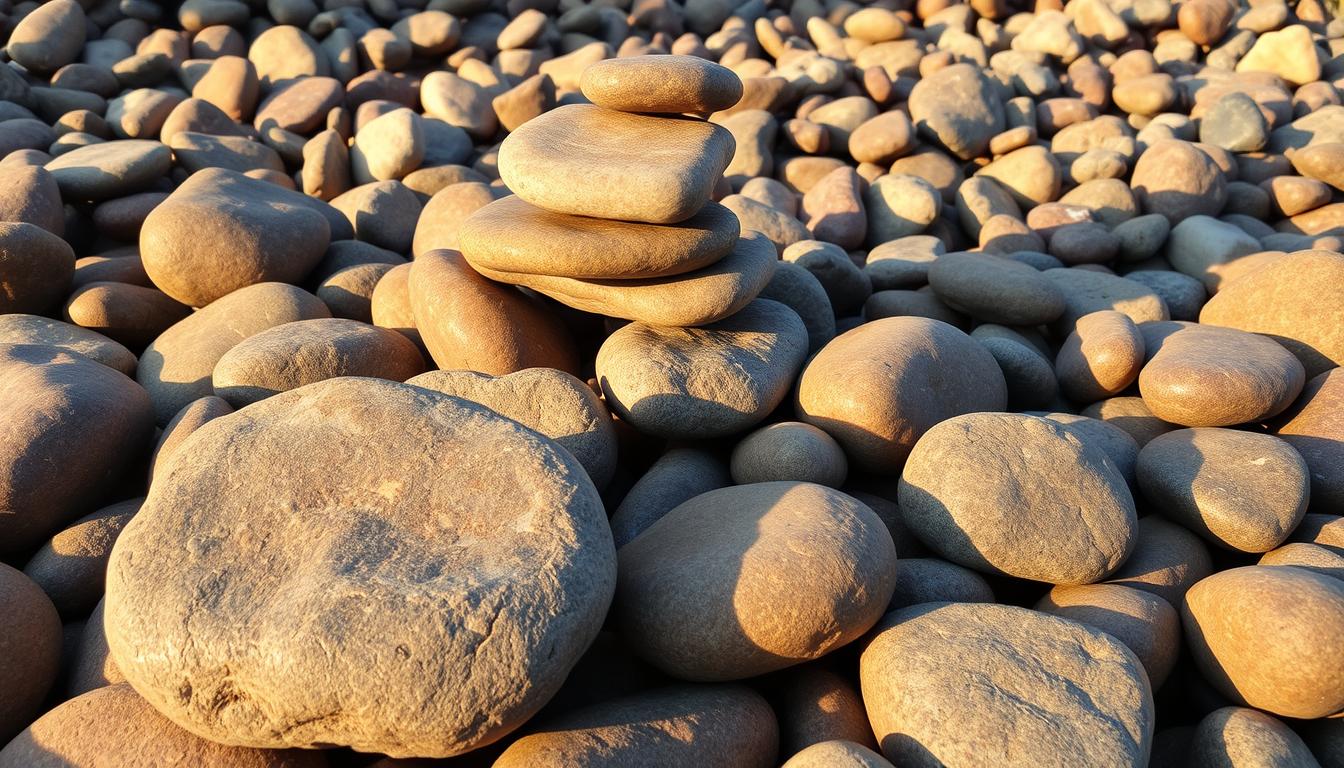
Final Polish Stage Assessment
The polishing stage typically requires 7-10 days and creates the mirror-like finish that makes rock tumbling rewarding. Monitoring during this stage focuses on shine development and surface quality.
Polish progress appears gradually, with rocks developing increasing luster over several days. The final 2-3 days usually produce the most dramatic improvement in shine quality.
Evaluating Shine and Luster Quality
Proper polish evaluation requires examining rocks under different lighting conditions. This comprehensive approach ensures you achieve maximum possible shine.
- Natural sunlight – reveals true color and surface quality.
- Indoor lighting – shows how rocks appear in typical viewing conditions.
- Direct lamp light – highlights surface imperfections and shine intensity.
- Wet examination – simulates final appearance after cleaning and display.
Post-Polish Quality Control
Final inspection determines whether your tumbling project achieved its goals. This evaluation helps you learn from each batch and improve future results.
Compare finished rocks to professional examples or previous successful batches. Well-polished rocks should display mirror-like reflections and vibrant natural colors without visible scratches or dull spots.
Creating an Effective Progress Log
A detailed progress log helps you track changes, identify patterns, and improve your tumbling technique over time. Consistent record-keeping leads to more predictable and successful results.
Document key information at each progress check to build a reference for future projects. Include dates, stage durations, observations, and any adjustments made during the process.
Essential Log Information
Record specific details that help you understand what works best for different rock types. This information becomes valuable for planning future tumbling projects.
- Date and stage – track timing for each phase transition.
- Rock condition – note surface quality, shape changes, and overall progress.
- Equipment settings – record barrel speed, loading, and grit amounts.
- Problem resolution – document issues encountered and solutions applied.
- Final results – evaluate success and areas for improvement.
Frequently Asked Questions
How often should I check progress during each tumbling stage?
Check coarse grind every 3-4 days, medium grind every 4-5 days, fine grind every 5-7 days, and polish stage every 3-4 days. Regular monitoring helps catch issues early and ensures proper stage transitions.
What indicates that rocks are ready to move from coarse to medium grind?
Rocks should have rounded edges, reduced sharp points, and uniform surface texture without deep scratches or chips. All rocks should tumble freely without jamming in the barrel.
Why do some rocks in my batch progress faster than others?
Different rock hardnesses cause uneven progress rates – softer rocks tumble faster than harder ones. Sort rocks by hardness before tumbling or remove fast-progressing rocks to maintain batch consistency. Understanding rock hardness differences helps you group compatible stones together. For rocks that consistently lag behind, consider implementing mixed hardness tumbling techniques.
How do I know if my rocks achieved maximum possible shine?
Well-polished rocks display mirror-like reflections, show vibrant natural colors, and feel completely smooth to touch. Test under various lighting conditions to confirm consistent shine quality across all surfaces.
What should I do if rocks show uneven polish results?
Extend polishing time by 2-3 days, check polish compound freshness, and ensure proper barrel loading. Some rocks may need individual attention or removal if they consistently lag behind the batch. For persistent issues, review our guide on improving rock tumble polish for additional techniques.
Final Thoughts
Rock Tumbling Progress Check techniques help you achieve consistently beautiful results by monitoring each stage carefully and making informed decisions about stage transitions. Regular inspection, detailed logging, and proper assessment techniques turn rough stones into stunning polished gems.
Start your next tumbling project with these monitoring methods and watch your success rate improve dramatically.