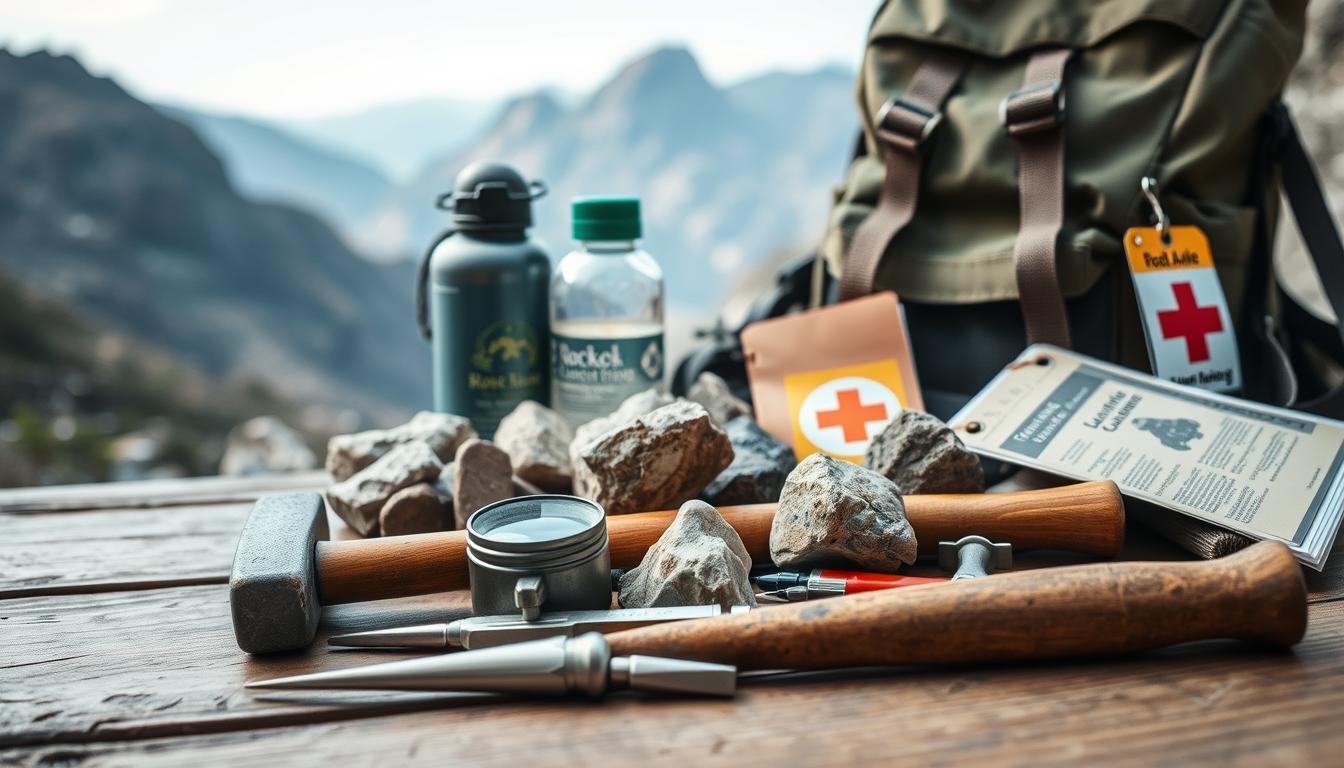
Rockhounding Checklist preparation can make the difference between a successful collecting trip and coming home empty-handed. Having the right tools and knowing what to bring transforms a casual walk into a productive adventure that yields impressive specimens for your collection.
Whether you’re heading to your first dig site or you’re a seasoned collector looking to refine your approach, a proper checklist keeps you organized and ready for any discovery. The right preparation also keeps you safe and comfortable during long days in the field, following essential rockhounding safety tips that protect you from potential hazards.
TL;DR
- Pack a 3-pound rock hammer, safety glasses, and leather gloves as your essential trio for safe specimen collection.
- Bring 12-15 small containers or bags to separate different minerals and prevent damage during transport.
- Carry 2 gallons of water per person for drinking, cleaning specimens, and emergency situations.
- Download offline maps to your phone since many prime rockhounding locations have no cell service.
Essential Rockhounding Checklist Tools
Your basic tool kit determines what specimens you can safely extract and collect. Start with these fundamental items that every rockhound needs in their collection arsenal.
Primary Collection Tools
- Rock hammer (3-pound) – The perfect weight for breaking rocks without excessive force that might damage specimens.
- Cold chisel set – Flat and pointed chisels in various sizes for precise splitting along natural fracture lines.
- Pry bar or crowbar – Essential for moving larger rocks and accessing specimens in tight spaces.
- Hand lens (10x magnification) – Helps identify minerals and assess specimen quality in the field, especially when you’re learning how to identify rocks in the field.
- GPS device or smartphone – Records exact locations of successful finds for future reference.
Safety Equipment
Safety gear protects you from flying rock chips, sharp edges, and hazardous terrain. Never compromise on these items regardless of how experienced you become.
- Safety glasses – Wraparound style provides the best protection from all angles.
- Leather work gloves – Protects hands from cuts while maintaining dexterity for handling specimens.
- Steel-toed boots – Essential protection when working around heavy rocks and tools.
- Hard hat – Required for quarry visits and recommended for any overhead hazards.
- First aid kit – Include bandages, antiseptic wipes, and any personal medications.
Collection and Storage Supplies
Proper storage prevents damage to your specimens during transport and helps you stay organized in the field. Broken specimens are worthless, so invest in quality storage solutions.
- Plastic containers (various sizes) – Rigid containers prevent crushing and allow you to separate different mineral types.
- Bubble wrap or newspaper – Wraps delicate specimens individually to prevent contact damage.
- Ziplock bags – Perfect for smaller specimens and provides easy labeling space.
- Permanent markers – Waterproof markers for field labeling that won’t fade or wash off.
- Field notebook – Records location details, geological observations, and specimen descriptions.
- Camera – Documents specimens in their natural setting before removal.
Pack Smart for Success
Use a backpack with padded compartments to distribute weight evenly and protect your tools during long hikes. A rolling cooler works great for car-accessible sites where you can collect heavier specimens.
Personal Comfort and Survival Items
Rockhounding often takes you to remote locations where basic amenities don’t exist. Comfort items keep you focused on collecting rather than dealing with discomfort or emergencies.
Food and Water
- Water (2 gallons per person) – One gallon for drinking, one for cleaning specimens and emergencies.
- High-energy snacks – Trail mix, energy bars, and dried fruit provide sustained energy for physical work.
- Lunch and extra food – Pack more than you think you need in case you find a productive site.
- Electrolyte supplements – Replace minerals lost through sweating during hot weather collecting.
Weather Protection
- Sun hat and sunscreen – Desert and mountain locations offer little shade for protection.
- Rain jacket – Weather changes quickly in many collecting areas.
- Extra clothing layers – Temperature can vary significantly between morning and afternoon.
- Work pants – Durable fabric that resists tears from rocks and brush.
Specialized Equipment by Location Type
Different collecting environments require specific tools and preparation. Beach collecting needs different equipment than mountain prospecting or quarry visits, so understanding how to research rockhounding sites helps you prepare appropriately for each location type.
Desert and Dry Climate Collecting
- Extra water containers – Double your normal water allocation for hot, dry conditions.
- Shade shelter or umbrella – Creates rest areas when natural shade doesn’t exist.
- Snake gaiters – Protects legs in areas with venomous snake populations.
- Sand scoop – Helps sift through loose soil and gravel for small specimens.
Stream and Creek Collecting
- Waterproof boots or waders – Keeps feet dry while working in and around water.
- Classifier screens – Separates materials by size when panning for small specimens.
- Plastic gold pan – Traditional tool that works for concentrating heavy minerals.
- Suction bottle – Picks up tiny specimens from sand and gravel.
Vehicle and Transportation Preparation
Your vehicle becomes your mobile base camp during collecting trips. Proper preparation prevents breakdowns and provides storage for tools and specimens. Using rockhounding maps helps you navigate to remote locations safely while planning your route and backup exits.
- Spare tire and jack – Many collecting sites have rough roads that increase puncture risk.
- Emergency car kit – Jumper cables, basic tools, and emergency supplies for remote area breakdowns.
- Cooler with ice – Keeps food fresh and provides cold drinks during hot weather.
- Tarp or blankets – Protects vehicle interior from muddy boots and rock dust.
- Rope or tow strap – Helps extract vehicles from soft ground or steep terrain.
Articles You May Like
Frequently Asked Questions
What’s the most important item on a rockhounding checklist for beginners?
Safety glasses are the most critical item because flying rock chips can cause permanent eye damage. A good rock hammer comes second for actually collecting specimens.
How much should a complete rockhounding kit cost?
A basic starter kit with hammer, safety gear, and collection supplies costs $75-150. Professional-grade tools and specialized equipment can push the total to $300-500.
Do I need permission to collect rocks on public lands?
Most public lands allow casual rock collecting with restrictions on quantity and methods. Always check local regulations and obtain permits when required before collecting. The Bureau of Land Management provides detailed guidance on collecting rules for federal lands.
What’s the best way to transport heavy specimens safely?
Use a wheeled cart or wagon for specimens over 20 pounds. Wrap everything in padding and secure containers to prevent shifting during transport.
How should I prepare for overnight rockhounding trips?
Add camping gear, extra water, more food, and emergency communication devices to your standard checklist. Plan for temperature changes and potential weather issues.
Final Thoughts
A well-planned Rockhounding Checklist transforms random wandering into focused collecting that builds your mineral collection systematically. The right preparation keeps you safe while maximizing your chances of finding quality specimens at productive locations like the best beaches for rockhounding.
Start with the essential tools and add specialized equipment as you discover your favorite collecting environments and mineral types. Consider joining a local rockhounding club to learn from experienced collectors and discover productive locations in your area.