Tumbling Quartz transforms rough stones into beautiful polished gems through a careful multi-stage process. Rock tumbling requires the right equipment, proper technique, and plenty of patience to achieve stunning results.
The process involves grinding rough quartz through progressively finer grits until you achieve a mirror-like shine. With the right rotary tumbler and quality abrasives, you can create professional-quality polished stones at home.
TL;DR
- Quartz tumbling takes 4-6 weeks using 80, 220, 400, and 1200 grit stages lasting 7-10 days each.
- Load your tumbler barrel 2/3 full with similar-sized quartz pieces for even results.
- Use 2 tablespoons of grit per pound of rock and add water until it covers the stones.
- Cerium oxide or aluminum oxide polish creates the final high-gloss finish on tumbled quartz.
Understanding Quartz Properties for Tumbling
Quartz ranks 7 on the Mohs hardness scale, making it ideal for tumbling. This hardness means quartz can achieve an excellent polish while being durable enough to withstand the tumbling process. Understanding mineral hardness ratings helps you select the right materials and techniques for successful tumbling.
The crystal structure of quartz allows it to develop a glass-like finish when properly tumbled. Different varieties respond slightly differently to the tumbling process.
Best Quartz Types for Tumbling
Several quartz varieties produce excellent tumbling results:
- Clear quartz – Creates brilliant transparent stones with high clarity.
- Amethyst – Purple variety that polishes to a stunning violet shine.
- Citrine – Yellow to orange quartz that develops warm golden tones.
- Rose quartz – Pink variety popular for jewelry making.
- Smoky quartz – Gray to brown stones with unique color depth.
Essential Equipment for Quartz Tumbling
Success in quartz tumbling depends on having the right tools and materials. A quality setup will last for years and produce consistently good results.
Choosing Your Rock Tumbler
Rotary tumblers work best for quartz because they provide consistent grinding action. Look for a tumbler with a rubber barrel liner and a motor rated for continuous operation.
Popular models include the Lortone 3A for beginners and the Thumler’s Tumbler UV-10 for larger batches. Barrel capacity should match your typical batch size.
Tumbling Grit Selection
You need four different grit stages to properly tumble quartz:
- 80 grit (coarse). Shapes stones and removes major rough areas.
- 220 grit (medium). Smooths surfaces and removes scratches from coarse stage.
- 400 grit (fine). Prepares surface for polishing by creating uniform smoothness.
- 1200 grit (pre-polish). Final smoothing before polish compound.
Additional Supplies Needed
Complete your tumbling setup with these essential items:
- Polish compound – Cerium oxide or aluminum oxide for final shine.
- Plastic pellets – Help cushion stones during polishing stages.
- Measuring tools – Kitchen scale and measuring cups for accurate ratios.
- Safety equipment – Dust mask, safety glasses, and gloves for handling grit.
Preparing Quartz for Tumbling
Proper preparation ensures even tumbling and prevents problems during the process. Take time to clean and sort your raw quartz before loading the tumbler. Following proper preforming techniques can significantly improve your final results.
Cleaning Raw Quartz
Remove all dirt, clay, and loose material from your quartz specimens. Use a stiff brush and water to scrub away surface debris.
Check for cracks or fractures that might cause stones to break during tumbling. Set aside damaged pieces for hand polishing instead.
Size Sorting and Batch Mixing
Group quartz pieces by similar size for even tumbling results. Stones should range from 1/2 inch to 2 inches for most home tumblers.
Mix different quartz types freely since they all have the same hardness. Combining clear quartz with amethyst or citrine creates attractive mixed batches.
Loading Tip
Fill your tumbler barrel 2/3 full with stones – never more. Overcrowding prevents proper grinding action and creates flat spots on your stones.
Stage-by-Stage Tumbling Process
Each tumbling stage serves a specific purpose in transforming rough quartz into polished gems. Follow the timing and ratios carefully for best results.
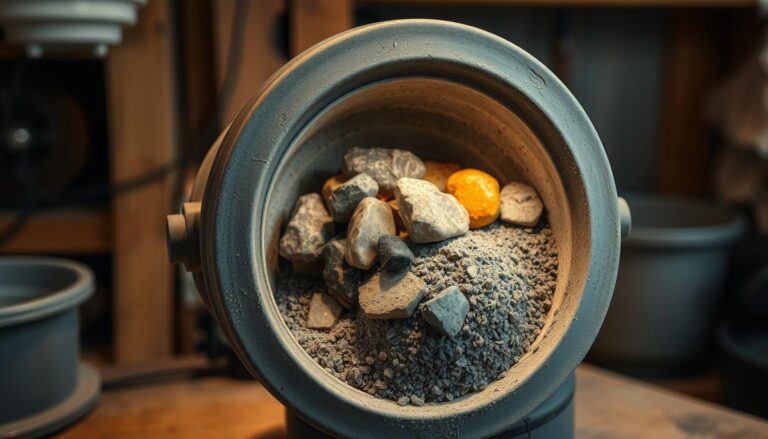
Stage 1: Coarse Grinding (7-10 days)
Load your sorted quartz into the tumbler barrel with 80 grit. Add 2 tablespoons of grit per pound of rock.
Cover stones with water and run continuously. Check every 2-3 days and add water as needed to maintain proper slurry consistency.
Stage 2: Medium Grinding (7-10 days)
Clean all stones and barrel thoroughly to remove coarse grit. Any remaining coarse grit will scratch your stones in later stages.
Load clean stones with 220 grit using the same ratio. This stage smooths out scratches from coarse grinding.
Stage 3: Fine Grinding (7-10 days)
Again, clean everything completely before adding 400 grit. This critical stage creates the smooth surface needed for high polish.
Monitor progress closely – over-grinding at this stage can create flat spots or uneven surfaces.
Stage 4: Pre-Polish (5-7 days)
Use 1200 grit for final smoothing. Some tumblers skip this stage, but it significantly improves final polish quality.
Add plastic pellets to cushion stones and prevent chipping during this delicate stage.
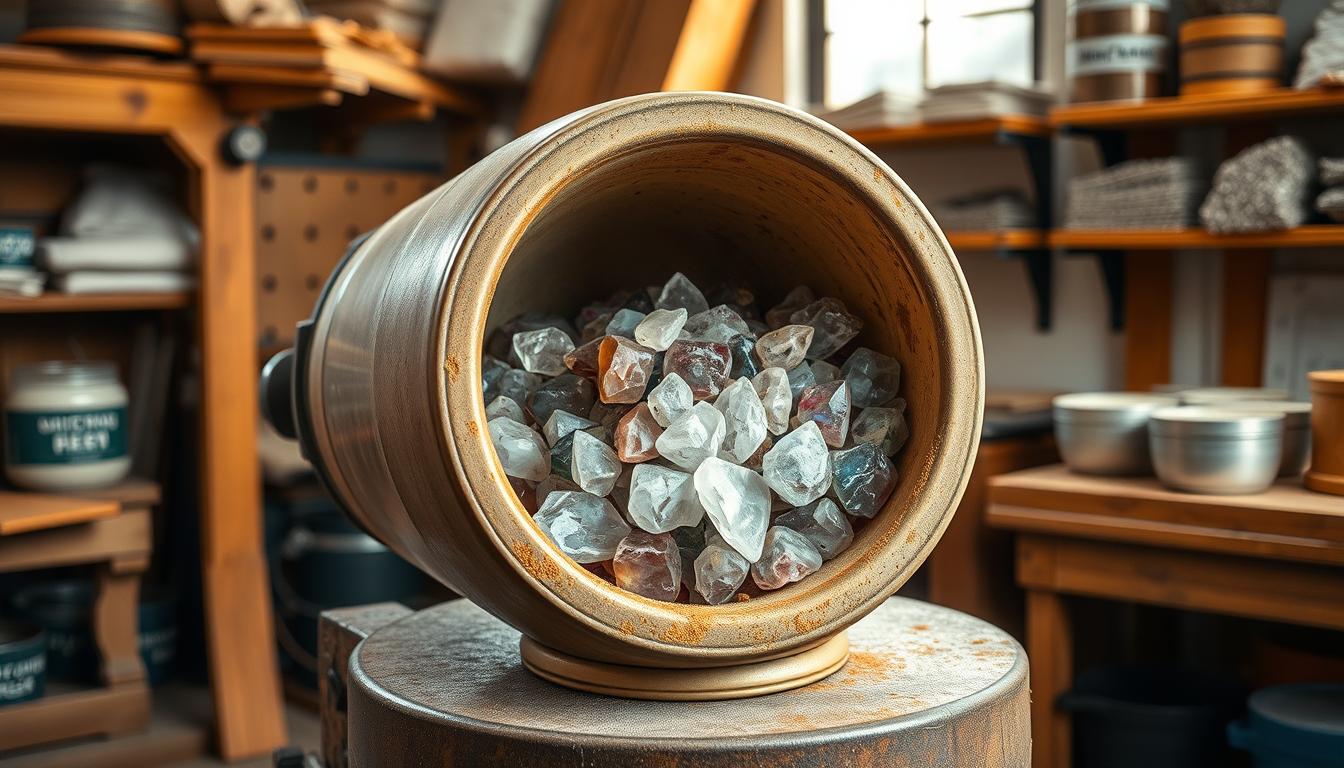
Stage 5: Final Polish (5-7 days)
Clean stones and barrel completely, then add polish compound. Use plastic pellets to cushion stones during polishing.
Check stones daily – over-polishing can create a cloudy finish instead of the desired high gloss.
Achieving Perfect Polish Results
The final polish stage determines your stones’ ultimate appearance. Small details make the difference between good and exceptional results. Understanding the relationship between rock hardness and polish quality helps you achieve professional-level results.
Polish Compound Selection
Cerium oxide produces the highest gloss on quartz but costs more than aluminum oxide. Both work well when used correctly.
Use about 1 tablespoon of polish per pound of stones. Add plastic pellets to fill remaining barrel space.
Burnishing for Extra Shine
Some tumblers add a burnishing stage using leather scraps or felt pieces with a small amount of polish compound. This creates an even higher gloss finish.
Run burnishing for 2-3 days maximum to avoid dulling the polish.
Troubleshooting Common Problems
Even experienced tumblers encounter issues occasionally. Most problems have simple solutions when you know what to look for.
Uneven Tumbling Results
Flat spots or uneven wear usually indicate barrel overloading or improper stone size mixing. Use uniform-sized stones and proper loading ratios.
Check that your tumbler runs smoothly without excessive vibration that could cause uneven grinding.
Scratches and Surface Imperfections
Scratches typically result from contamination between stages or using worn-out grit. Always clean thoroughly between stages.
Deep scratches may require going back to an earlier grit stage to remove them completely.
Cloudy or Dull Finish
Cloudy polish usually indicates contamination or over-polishing. Clean all equipment thoroughly and reduce polishing time.
Sometimes stones need a light re-polish with fresh compound to restore clarity. If your stones develop cracks during tumbling, check our guide on why rocks crack in tumblers for prevention tips.
Articles You May Like
Frequently Asked Questions
Frequently Asked Questions
How long does it take to tumble quartz completely?
The complete tumbling process takes 4-6 weeks with each stage running 5-10 days. Rushing stages produces poor results.
Can different types of quartz be tumbled together?
Yes, since all quartz varieties have the same hardness rating of 7. Mix amethyst, citrine, and clear quartz freely in the same batch.
What causes flat spots on tumbled stones?
Overloading the tumbler barrel or running stages too long creates flat spots. Keep barrel 2/3 full and follow recommended timing.
Why did my quartz turn out cloudy instead of clear?
Cloudy results usually come from contamination between stages or over-polishing. Clean thoroughly between stages and monitor polish timing.
How much grit should I use for each stage?
Use 2 tablespoons of grit per pound of rock for all grinding stages. Polish stages need about 1 tablespoon per pound.
Final Thoughts
Tumbling Quartz successfully requires patience, proper equipment, and attention to detail at each stage. The multi-week process transforms rough stones into beautiful polished gems worthy of jewelry or display.
Start with quality raw material and take time to properly clean between stages. Your patience will be rewarded with stunning results that showcase quartz’s natural beauty.