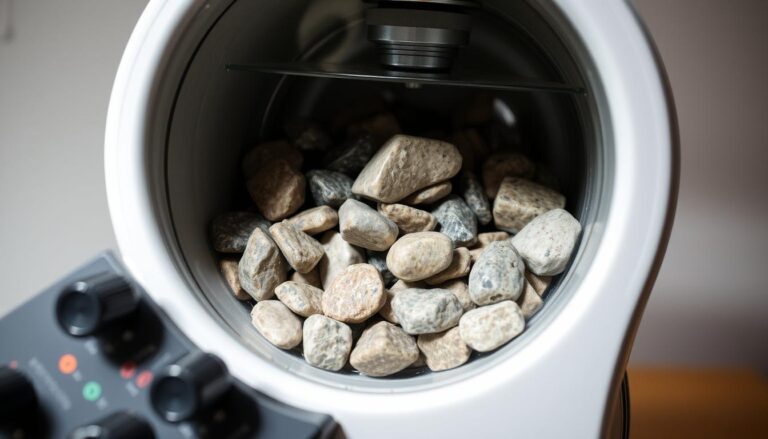
Rocks Crack In Tumbler issues can turn an exciting rock tumbling project into a frustrating experience. When your carefully selected stones emerge from the tumbler damaged or broken, it’s usually due to preventable factors like incorrect rock selection, improper tumbling times, or using rocks with existing stress fractures.
Understanding why rocks crack during tumbling helps you avoid this common problem and achieve the smooth, polished results you’re working toward. Most cracking occurs because certain rock types aren’t suitable for tumbling, or because the tumbling process exposes hidden weaknesses in the stone structure.
TL;DR
- Soft rocks under 6 on the Mohs hardness scale crack easily and should be avoided in tumblers.
- Tumbling time should not exceed 7 days per stage to prevent over-stress on rock structures.
- Pre-existing fractures cause 80% of tumbler cracking – inspect rocks carefully with a magnifying glass before tumbling.
- Mixing rocks of different hardness levels creates uneven pressure that leads to cracking in softer stones.
Why Rocks Crack In Tumbler During Processing
Rock cracking happens when the constant rotation and abrasion in your tumbler exceeds the stone’s structural limits. The tumbling action creates pressure from multiple directions simultaneously, and rocks with internal weaknesses simply can’t withstand this stress over several days of continuous motion.
Temperature changes during tumbling also contribute to cracking, especially in rocks with different mineral compositions that expand and contract at different rates. This thermal stress adds another layer of pressure beyond the mechanical forces already at work.
Common Rock Types That Crack Easily
Certain rock types are particularly prone to cracking in tumblers and should be avoided or handled with extra care. Understanding which rocks to skip saves you time and prevents disappointment.
- Sedimentary rocks – Sandstone, limestone, and shale have layered structures that split apart under tumbler pressure.
- Soft minerals – Calcite, fluorite, and gypsum rate below 6 on the Mohs scale and crack easily.
- Fractured specimens – Any rock showing visible cracks, regardless of type, will likely break further.
- Weathered rocks – Stones that have been exposed to elements often develop internal weaknesses.
- Composite rocks – Rocks with multiple mineral types expand differently and create internal stress.
How to Prevent Rocks from Cracking
Prevention starts with careful rock selection and continues through every stage of the tumbling process. Taking time to properly evaluate and prepare your rocks eliminates most cracking problems.
Inspect Rocks Before Tumbling
Examine each rock under good lighting with a magnifying glass if possible. Look for hairline cracks, chips, or areas where the rock surface appears different in color or texture – these often indicate internal weaknesses.
Tap each rock gently with a small hammer or another rock. Solid rocks produce a clear, ringing sound, while cracked rocks make a dull thud.
Choose Compatible Rock Hardness Levels
Group rocks by hardness rating when loading your tumbler. Mixing very hard rocks (like quartz at 7) with softer ones (like calcite at 3) creates uneven pressure that damages the softer specimens.
If you must mix hardness levels, limit the difference to 1-2 points on the Mohs scale. This keeps the tumbling action more balanced and reduces stress on individual rocks.
Start with Small Batches
Test new rock types in small quantities first. This lets you learn how different stones behave in your specific tumbler without risking large collections.
Monitor Tumbling Duration
Extended tumbling times increase the likelihood of cracking as rocks experience more total stress cycles. Most rocks complete each stage effectively within 5-7 days of continuous tumbling.
Check your tumbler contents every 2-3 days during the first stage to monitor progress. If rocks are shaping well ahead of schedule, you can move to the next stage early rather than risk over-tumbling.
What to Do When Rocks Crack
When you discover cracked rocks in your tumbler, remove them immediately to prevent the fragments from damaging other stones. Small chips and fragments act like extra-aggressive grit that can scratch or crack remaining rocks.
Save larger cracked pieces if they still have interesting patterns or colors. These can become display specimens or practice pieces for learning lapidary techniques beyond basic tumbling.
Salvaging Cracked Specimens
Some cracked rocks can be stabilized with super glue or epoxy resin if the break is clean and the pieces fit together well. This works best for display purposes rather than continued tumbling.
Consider using cracked pieces as raw material for other projects like wire wrapping or as accent stones in larger displays. The natural break patterns often create interesting textures and surfaces.
Choosing Better Tumbling Rocks
Success in rock tumbling starts with selecting appropriate raw materials. Focus on rocks known for their tumbling durability and avoid problematic types until you gain more experience.
- Agate – Extremely durable with hardness around 7, tumbles beautifully.
- Jasper – Hard, dense rock that produces excellent polish and rarely cracks.
- Quartz varieties – Including amethyst and citrine, these handle tumbling stress well.
- Petrified wood – Silicified wood combines interesting patterns with good hardness.
- Obsidian – While brittle when struck, it tumbles well when handled carefully.
Frequently Asked Questions
Can I glue cracked rocks back together and continue tumbling?
No, glued rocks will break apart again under tumbling pressure and the adhesive can damage your tumbler barrel. Remove cracked rocks completely from the tumbling batch.
How do I know if a rock is too soft for tumbling?
Rocks below 6 on the Mohs hardness scale are generally too soft for tumbling. You can test hardness by trying to scratch the rock with common items like a steel file (hardness 6.5) or glass (hardness 5.5).
Why do my rocks crack only in the final polishing stage?
Rocks that survive earlier stages but crack during polishing often have stress fractures created by extended tumbling time. The fine polishing grit can work into these microscopic cracks and cause failure.
Should I throw away all cracked rocks from my tumbler?
Remove cracked rocks from tumbling immediately, but save interesting pieces for display or other projects. Clean breaks often reveal beautiful internal structures and patterns worth keeping.
Final Thoughts
Rocks Crack In Tumbler problems are mostly preventable through careful rock selection and proper tumbling techniques. Focus on choosing hard, solid specimens without visible fractures, and monitor your tumbling times to avoid over-processing.
Start with proven tumbling rocks like agate and jasper to build your skills before experimenting with more challenging materials. Each successful batch teaches you more about identifying good tumbling candidates for future projects.